All of our items are fully customisable, so we do require you to contact us before preceding with payment. Failing to do so may result in you losing transaction fees through the refund process.
The preferred way to contact us is through Facebook or Instagram messenger, however if neither of these are available to you we can also be reached at masandals@hotmail.com
For keyrings, DIY kits and any additional items we just need to confirm the colour choices are in stock. For the sandals however we require a template.
Please refer to the video below and follow the instructions.
Creating a Sandal Template:
Paper should be a plain standard A4 sheet. 210mm x 297mm this is for scaling, if you do not have this available please message and we can look at other options.
Please use a standard sized pen. (Sharpies will add on a fair bit more than a biro, you can go over the line with a sharpie afterwards if you would like though👍🏻)
Foot flat and relaxed with lower leg straight, (sitting in a chair might be easier but can change the shape of your foot?)
You may be able to fit both feet on one piece of paper?
Draw round outside of each foot, please keep your pen upright and not angled in. At the inside of each foot you can angle the pen in to avoid the ankle and it will still trace a line with plenty of material for under the foot.
When looking down you should be able to see the line around your foot, there will be a 1-2mm gap between it and your foot if you have held the pen upright.
Before lifting your foot, place the pen between your big toe and second toe. Then point the tip of the pen towards the back and outside of your foot (should be slightly under the second toe where it meets the rest of the foot)
Join the tops of the toes in a single smooth line.
The sandals will be made to the outside line you have drawn unless discussed otherwise.
We do smooth out the small lumps and bumps before cutting.
If you are ordering the Posh Anes you will need to make two additional marks at the side of each foot as per the example picture below.
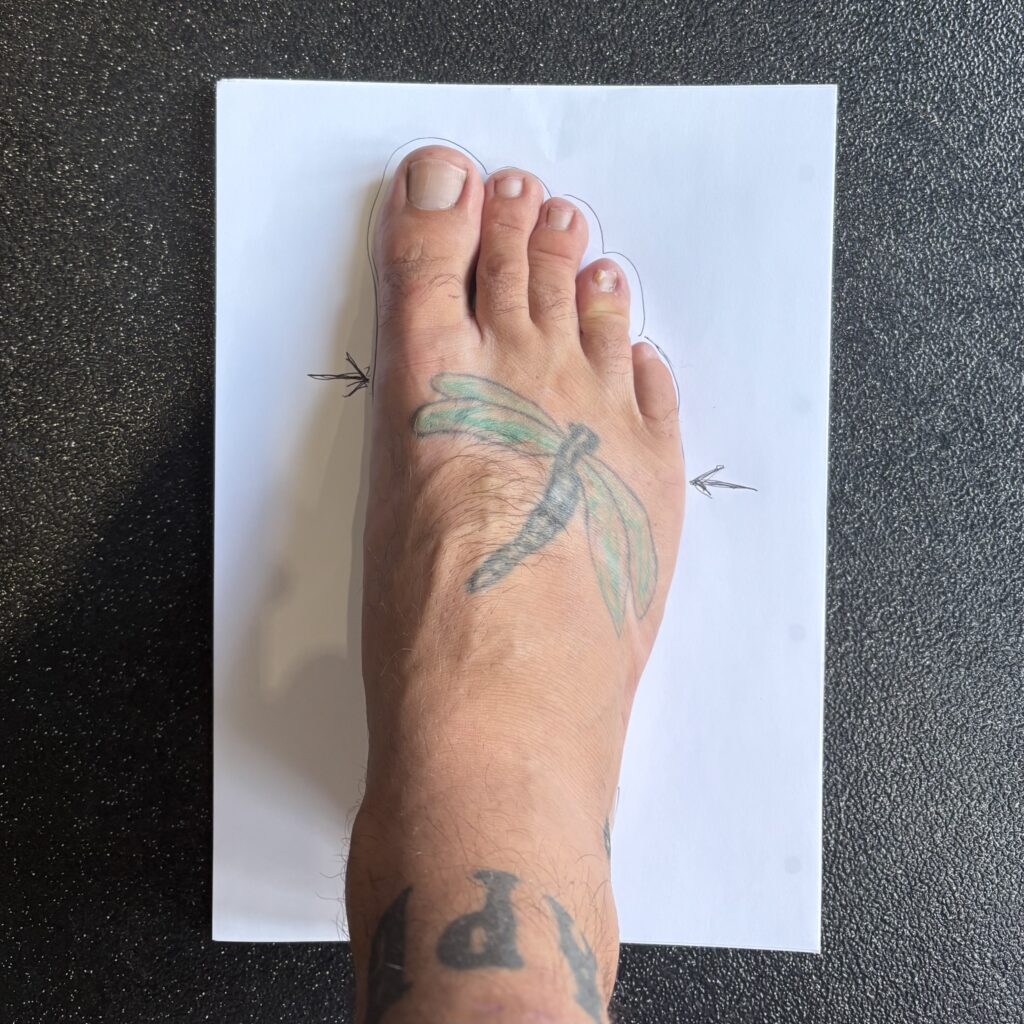
The ideal place for these marks to be are just behind the joint where your toes meet the rest of your foot. this is so your toes aren’t squeezed when the laces are tightened.
Taking the photos:
Leave the paper on the (preferably contrasting coloured) floor then
either take a picture with your phone levelled with all four edges of the paper visible
( IOS phones have a level, go to Settings>camera and toggle ‘level’ or ‘grid’ on
For Android it may be labelled as ‘grid lines’)
Or stand with the phone at chest height, directly over the template, looking straight down, zoom in and take a picture with all four sides of the paper still visible
Please try to avoid shadows/light spots over the paper as well.
Thank you
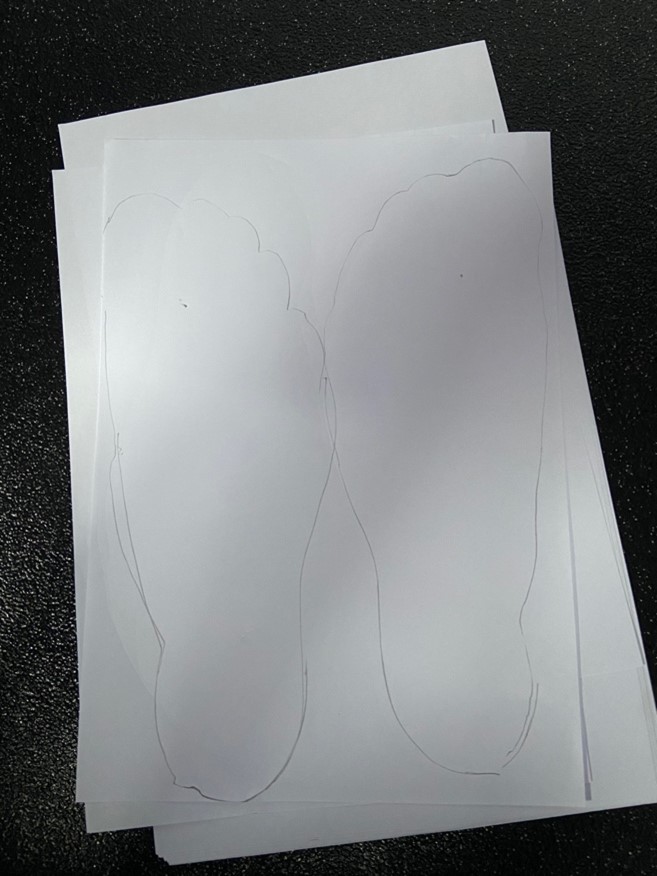
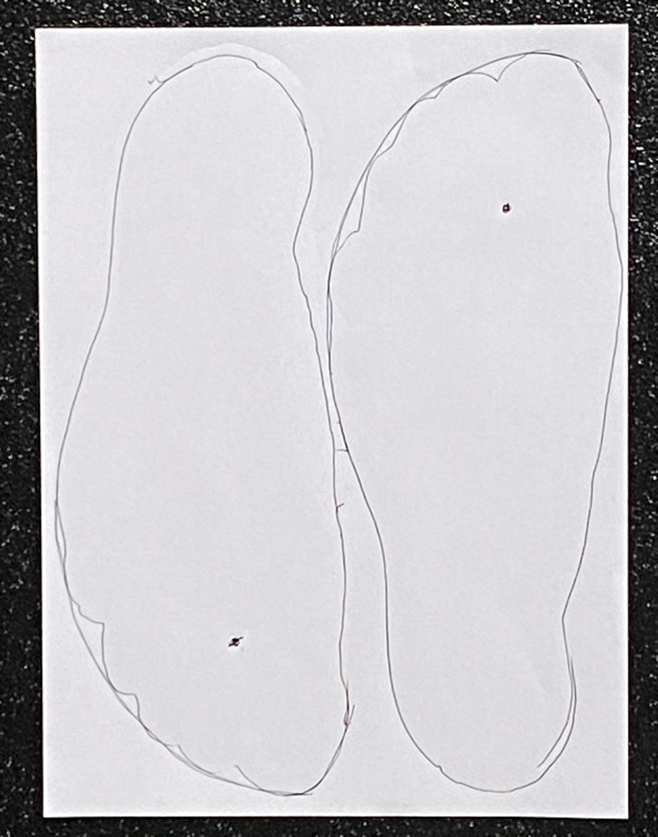
The two pictures above are examples of an unsatisfactory template and a satisfactory one.
Once we have a satisfactory template, for our standard sandals you will need to provide us with your choice of :
Sole (colour)
1x Pair of Laces (colour)
1x Pair of HT Straps (colour)
1x Pair of Fitted Toe Loops (colour)
1x Pair of Spare Toe Loops (colour)
For our Posh Anes you will need to provide us with your choice of :
Sole (colour)
First pair of laces (Type and colour)
Second pair of laces (Type and colour)
10 fitted loops (colour)
5 spare loops (colour)
as well as any additional items or extra material that may be required.
Please copy and paste the above layout to your message and also add it as a note to your order if possible.
You are also welcome to split everything into individual colours if you wish as well, we have just tried to simplify it a little?
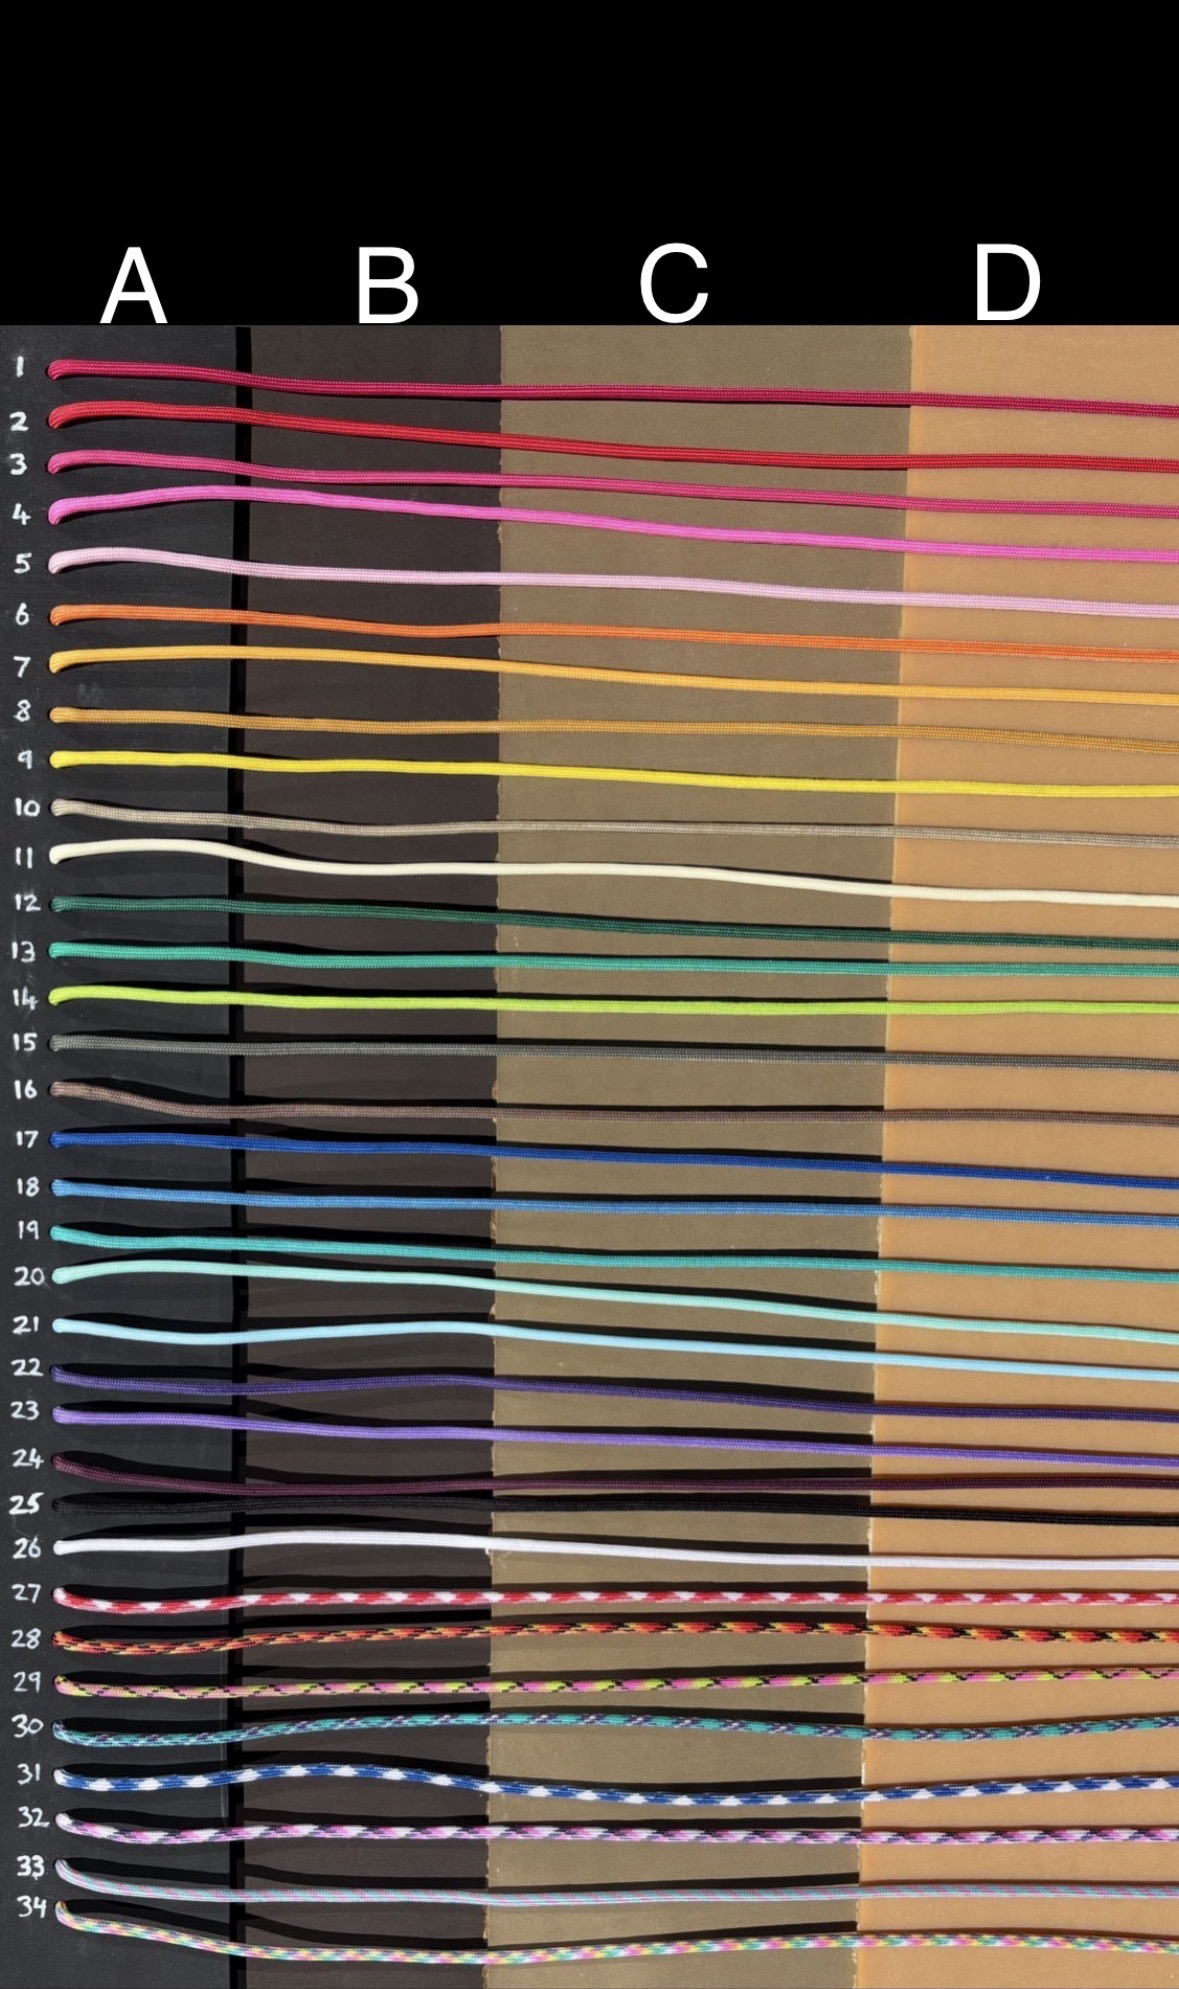
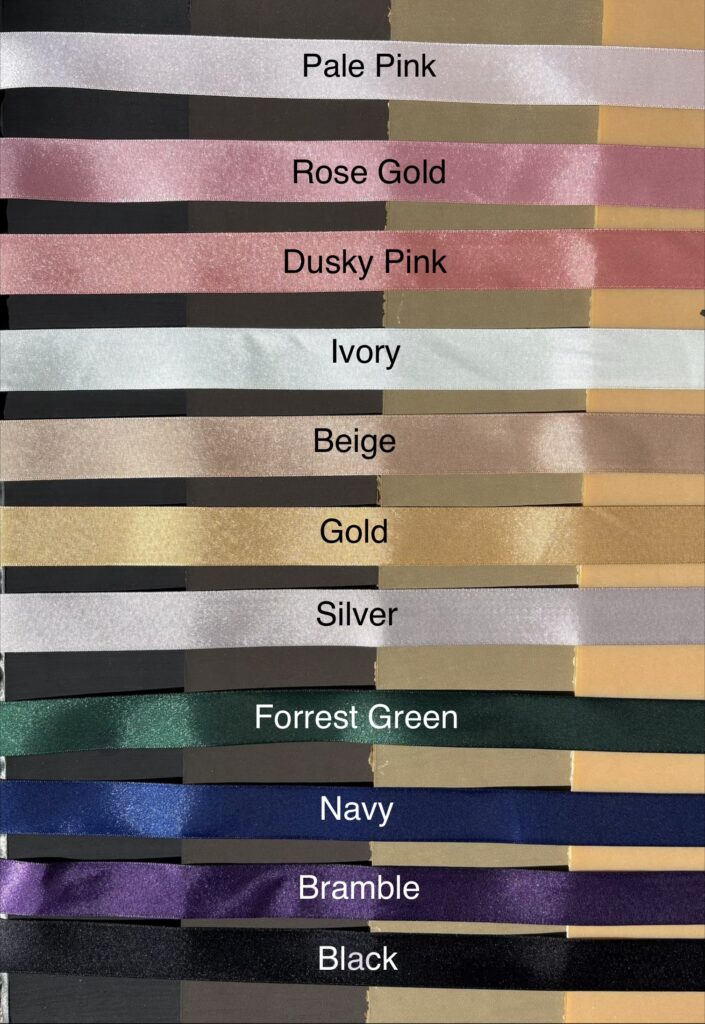
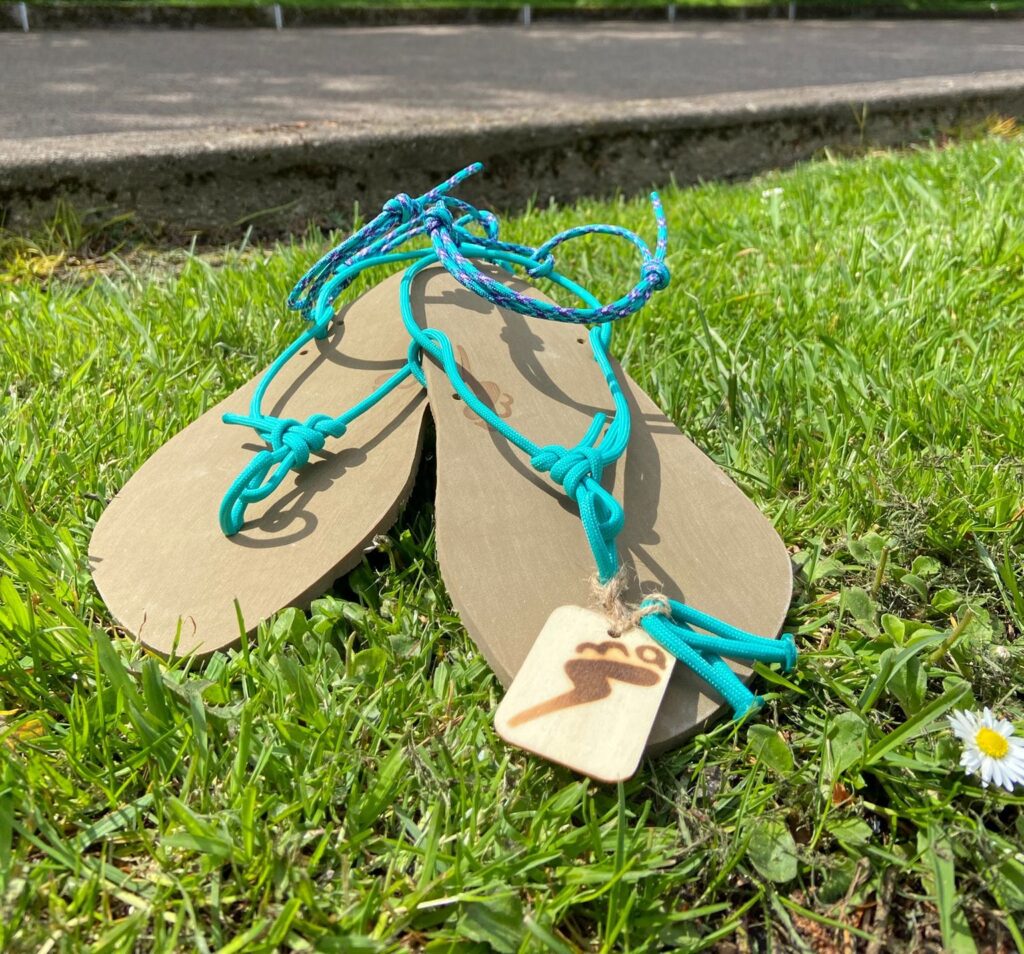
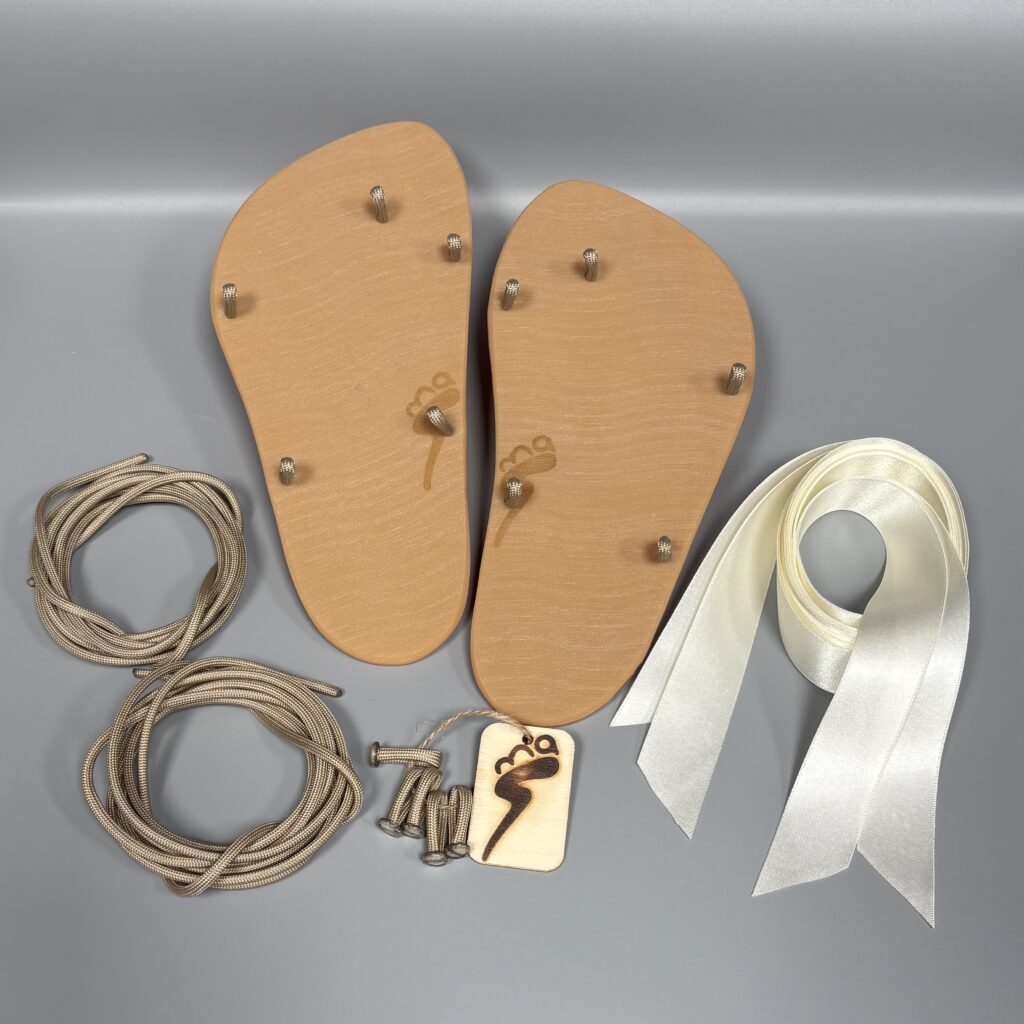
Please refer to the pictures below for choices and reference of the items included.
The lace colours are numbered down the left hand side and the sole colours are the background and lettered across the top.